

Changing spark plugs is a routine maintenance task, but it depends on the right tools, the correct plug type, and careful installation. The job starts with clean access to the plug wells, then moves through safe removal, proper gap setting, and precise tightening. A small mistake can affect engine performance or damage the threads. The key steps are straightforward, but the details matter.
Key Takeaways
- Gather the right tools: spark plug socket, ratchet, gap tool, compressed air, anti-seize, and a torque wrench.
- Check your owner’s manual for the correct spark plug type, gap, and engine-specific requirements.
- Clean around each plug, remove the wire or coil, and unscrew the old plug carefully.
- Gap the new plug to spec, hand-thread it first, then torque it to the manufacturer’s specification.
- Start the engine and check for smooth idle, no warning lights, and normal acceleration.
What Tools Do You Need to Change Spark Plugs?
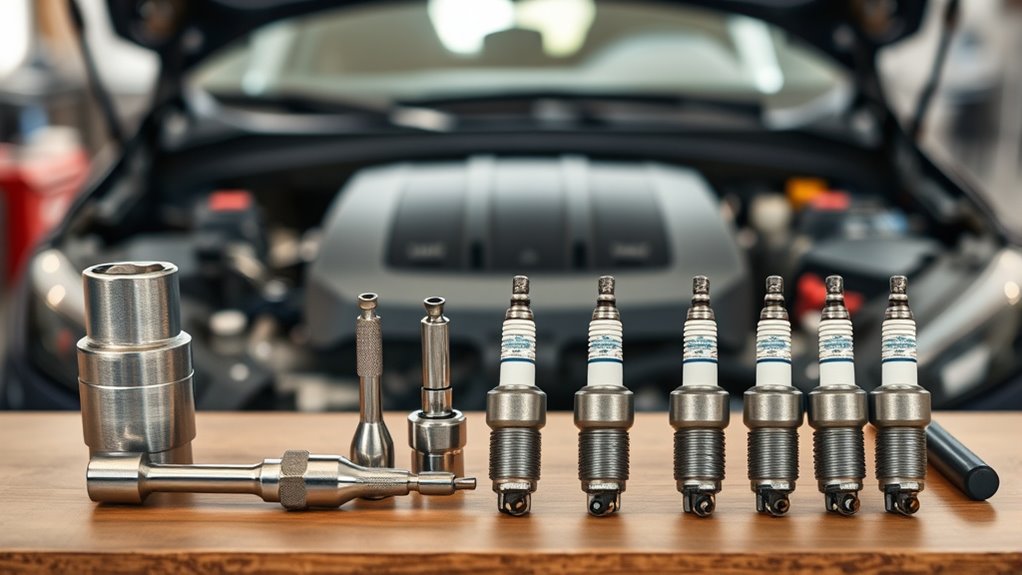
A proper spark plug job begins with the right tools: a ratchet and socket set, usually with a 5/8-inch or 13/16-inch spark plug socket depending on the vehicle. These tools remove and reinstall plugs without damaging the hex or porcelain.
A spark plug gap tool is needed to verify and adjust the gap on each new plug before installation, supporting consistent ignition and clean combustion. Compressed air helps clear dirt and grit around the plug wells, reducing the chance of debris entering the cylinder head during removal.
A spark plug gap tool verifies each plug’s gap, while compressed air clears debris before removal.
Anti-seize lubricant is applied sparingly to the threads of the new plugs to limit seizure and preserve serviceability. A torque wrench is essential for tightening to the manufacturer’s specified setting, preventing under-tightening or thread damage.
With these tools in hand, the task becomes controlled, efficient, and accessible rather than dependent on guesswork or excessive force.
How Do You Find the Right Spark Plug?
The vehicle owner manual should be checked first to identify the specified spark plug type and required engine specifications.
The plug selection must then match the engine’s make, model, year, heat range, and any modification-related recommendations.
Before installation, the plug gap should be verified against the listed setting to guarantee proper performance.
Check Vehicle Manual
Consulting the owner’s manual is the most reliable way to identify the correct spark plug for a vehicle, since it lists the required part number and engine-specific specifications.
When a person must check vehicle manual data, the spark plug choice becomes clear and less dependent on guesswork. The manual usually notes heat range and electrode design, which supports proper fit and performance.
- Verify the part number against the manual.
- Confirm heat range and electrode design.
- Use auto parts databases or a professional if uncertainty remains.
Manufacturer websites and store databases can reinforce the manual’s guidance by matching make, model, and year.
This approach keeps maintenance direct, informed, and independent, while reducing the risk of incompatible parts.
Match Engine Specifications
Matching the engine specifications is the next step after identifying the manual’s recommended part number. The correct plug must suit the engine’s design, combustion demands, and any constraints that protect the head gasket and surrounding hardware.
A vehicle owner manual gives the primary reference, including part number, heat range, and other required details. If uncertainty remains, an auto parts store database can cross-reference make, model, and year. Manufacturer apps and online selectors also map engine data to the proper plug.
Examining the removed plug can confirm brand, part number, and visible characteristics. This process reduces guesswork, supports reliable ignition, and keeps maintenance in the driver’s control.
Verify Plug Gap
A spark plug gap tool should be used to measure the distance between the electrodes and confirm it matches the manufacturer’s specification.
To verify plug gap, the technician checks every plug before installation, even if it is sold as pre-gapped. Small deviations can disrupt combustion, reduce fuel efficiency, and trigger misfires.
The vehicle manual or plug maker’s data provides the correct measurement, which should be followed exactly. If the gap is off, it should be adjusted with care to avoid damaging the electrodes.
- Measure the gap with the correct tool.
- Compare it with the specified value.
- Adjust only when needed, then recheck.
Regular inspection keeps the ignition system efficient, supports engine life, and helps preserve mechanical independence.
How Do You Remove Old Spark Plugs Safely?
Clear the area around each spark plug with compressed air before removal to prevent debris from falling into the cylinder. A clean workspace supports safer service and reduces the chance of contamination.
The spark plug wire should be grasped at the boot and pulled straight off, not twisted, so the connection and lead stay intact. Next, the spark plug is loosened by turning it counterclockwise with the correct socket and extension. If resistance appears, a brief back-and-forth motion can help release it without stripping the threads. Slow, controlled force is preferred over urgency.
Once free, the plug should be lifted out gently to avoid cracking the ceramic body or dropping fragments into the well. After removal, the spark plug is inspected for wear, oil fouling, heat damage, or electrode erosion, since these signs can reveal engine faults. Careful handling preserves freedom from avoidable repair costs.
How Do You Gap Spark Plugs Correctly?
Use a spark plug gap tool to measure the distance between the center and ground electrodes, and set it to the manufacturer’s specified range for the engine. The spark plug gap controls how easily the ignition system fires, so exact measurement supports clean combustion and dependable output.
- Measure each plug before installation; pre-gapped plugs can drift from spec during handling or shipping.
- Adjust only within the engine’s stated range, typically 0.028 to 0.060 inches, using the proper tool for precise control.
- Recheck the gap after adjustment and after installation to confirm consistency across all cylinders.
Correct gapping improves ignition efficiency, fuel economy, and overall engine performance. It also reduces misfires that waste power and limit mechanical freedom.
A properly set spark plug gap helps the engine work with less strain and better response.
How Do You Install Spark Plugs Without Cross-Threading?
To prevent cross-threading, the spark plug should be hand-threaded first so the threads can seat correctly in the cylinder head.
A spark plug socket with a rubber insert can help keep the plug aligned, and any resistance should prompt backing it out slightly before retrying.
Once seated, it should be tightened with a torque wrench to the manufacturer’s specification for a secure fit without over-tightening.
Hand-Thread First
The spark plug should be started by hand and threaded into the engine slowly so the threads engage smoothly without resistance, reducing the risk of cross-threading. This method protects the cylinder head and helps preserve the head gasket seal.
- If resistance appears, stop immediately, back off slightly, and restart the thread by hand.
- Use a spark plug socket that fits snugly to keep the plug straight during initial installation.
- Apply anti-seize to the threads when specified, then tighten with a torque wrench to the manufacturer’s value.
Hand-threading gives the installer control, avoids forced engagement, and supports a clean, reliable seal.
It is a practical step that keeps repair work precise, efficient, and free from avoidable damage.
Align Spark Plug
Careful alignment starts with threading the new spark plug in by hand so the threads engage cleanly and the plug seats squarely in the cylinder head. This step helps align spark plug threads without forcing them, preserving the engine’s freedom from damage.
A light coat of anti-seize on the threads can ease future removal, but it should not contaminate the electrode or head gasket surface. If resistance appears, the plug should be backed off slightly and realigned before continuing. Proper seating confirms the shell is straight in the bore and not trapped at an angle.
Once the plug turns smoothly to its seat, the installer can move on to final tightening, confident the threads are protected and the cylinder head remains uncompromised.
Torque Carefully
Once the spark plug has been threaded in by hand and seated smoothly, final tightening should be done with a torque wrench set to the manufacturer’s specification. This controlled step prevents cross-threading, over-compression, and stripped threads, preserving engine integrity and freeing the mechanic from avoidable damage.
Anti-seize on the spark plug threads, applied sparingly before installation, can support future removal.
- Hand-thread first: confirm smooth engagement before any tool is used.
- Torque precisely: tighten only to spec; do not chase extra force.
- Inspect routinely: replace worn spark plugs during scheduled maintenance.
Gentle pressure is sufficient when the plug seats correctly.
Mechanical discipline here protects performance, efficiency, and the freedom to service the engine without costly repairs.
How Do You Test the Engine After Installation?
Start the engine and listen closely for unusual noises that could indicate improper installation or a faulty spark plug. If the idle is unstable, a lean or misfiring cylinder may be present, and the technician should verify the plugs before damage reaches the head gasket. Check the dashboard for warning lights.
| Test step | What to observe |
|---|---|
| Idle check | Smooth running, no stalling |
| Noise check | No ticking, knocking, or misfire |
| Warning lights | No illuminated indicators |
| Road test | Clean acceleration, no hesitation |
A brief test drive should confirm steady acceleration and normal power delivery. The engine should respond without shuddering or delay. If vibrations, poor throttle response, or warning lamps persist, the installation must be reexamined. Correct torque and proper gap settings are the first items to confirm. This final verification protects performance, preserves mechanical integrity, and gives the driver confidence to proceed with a liberated, reliable machine.
Frequently Asked Questions
Can I Change My Spark Plugs Myself?
Yes, it can be done through DIY Maintenance. With the correct plugs, battery disconnected, and gap checked to specification, a careful owner can replace them safely, reclaiming control, reducing cost, and maintaining engine efficiency.
Will Autozone Change Spark Plugs for You?
AutoZone typically will not change spark plugs for customers. It supports DIY Alternatives by selling parts, loaner tools, and offering free diagnostics. Staff can identify the correct plugs, but installation usually remains the customer’s responsibility.
What Are Signs of a Bad Spark Plug?
Signs of a bad spark plug include misfires, rough idle, weak acceleration, black soot, white blistering, worn electrodes, corrosion, and excessive gap. Such faults reduce Engine Performance, wasting fuel and freedom from dependable driving.
Is Changing Spark Plugs a Hard Job?
Changing spark plugs is usually low DIY Difficulty. With basic tools, it is often straightforward, though tight engine bays, stripped threads, and torque requirements can raise complexity. Proper preparation keeps the job practical and efficient.
Conclusion
Changing spark plugs is a straightforward maintenance task when done with care and the correct tools. The process depends on selecting the right plug, cleaning the area, removing the old plugs safely, setting the proper gap, and installing the new plugs by hand before torquing them to specification. With each step completed correctly, the engine should start smoothly and run like a well-tuned machine, maintaining performance, fuel efficiency, and reliable ignition.